17 Jan Step-by-step Guide to Magnesium Oxide Sheathing Installation
You can make your building projects better with the new magnesium oxide sheathing installation in 2025. Many builders pick this way now. LEED-certified projects use it 35% more. Government contracts use it 80% more. Government spending on upgrades is US$ 2.5 billion.
Category | Adoption Rate Change |
|---|---|
LEED-certified projects | 35% increase |
Government contracts | 80% increase |
Government spending on upgrades | US$ 2.5 billion |
If you follow the new steps, you get these good things:
Fire resistance and moisture protection
Healthy indoor air and termite proofing
Easy handling and quick installation
You can use this guide if you are a worker or do DIY projects. Cleaning, measuring, and sealing make your work strong and last long.
Key Takeaways
Magnesium oxide sheathing stops fire and keeps out water. It helps the air inside stay clean. Builders like to use it because it works well.
Use the correct tools for cutting. Pick carbide-tipped knives and saws that make less dust. This helps you cut neatly and stay safe.
Clean and check all surfaces before you start. This stops water problems and helps the boards stick well.
Put waterproof sealant on every edge and joint. This keeps water out and makes your work last longer.
Use the right way to fasten and space the boards. This keeps them tight and makes your project look good for a long time.
Magnesium Oxide Sheathing Installation: Tools and Materials
Essential Tools for 2025
You need special tools and materials to put in magnesium oxide boards. In 2025, builders use new tools for better work. Get all your tools and materials before you begin.
A carbide tipped scoring knife helps you cut and break boards neatly.
A dust reducing circular saw keeps dust down and makes clean cuts.
Fiber cement shears help you make small, careful cuts.
Saw horses hold the boards steady when you measure and cut.
A square helps you draw straight lines for good cuts.
A putty knife spreads glue and fills in seams.
These tools and materials help you work faster and safer. You can use them for inside or outside walls.
Required Magnesium Oxide Boards and Accessories
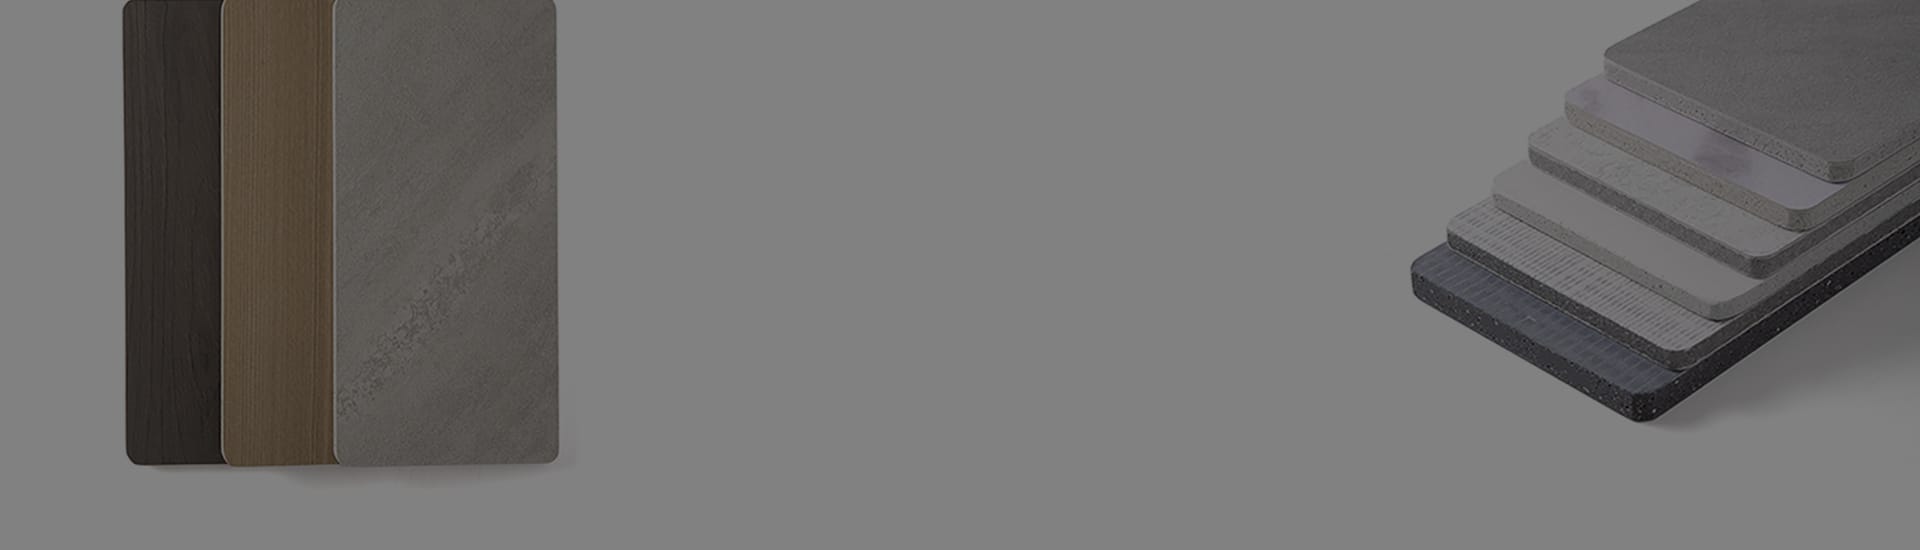
Pick the right magnesium oxide boards and accessories for your job. In 2025, US MgO Co. made new panels for inside and outside walls. These boards are good for the earth, stop fires, and keep out water. They last longer than plywood or OSB. You can use regular tools and materials to put them in most buildings.
Material Type | Description |
|---|---|
Screws | Use screws that do not rust, like 316 stainless steel or ceramic coated fasteners. |
Adhesives | Pick glue that works with water for strong holds. |
Joint Compounds | Use soft fillers and fiberglass tape in the finishing mix. |
Safety Equipment | Always wear the right safety gear when you work. |
Use 316-stainless steel fasteners for magnesium oxide boards. Ceramic coated fasteners are also good. For wood studs, use #8 flat head screws. For metal, use 18 gauge screws with points that drill themselves.
Safety Gear and Precautions
Wear safety gear every time you work with magnesium oxide boards. Safety gear keeps you safe from dust and sharp edges. In 2025, you need these things:
Safety Gear |
|---|
Glasses |
Gloves |
Dust Mask |
Wear a dust mask and safety glasses when you cut or sand boards. Use water or a HEPA vacuum to clean up dust. Do not sweep dry dust. Safety gear keeps you healthy and safe while you work.
Tip: Always check your safety gear before you start. If your safety gear is broken, replace it right away.
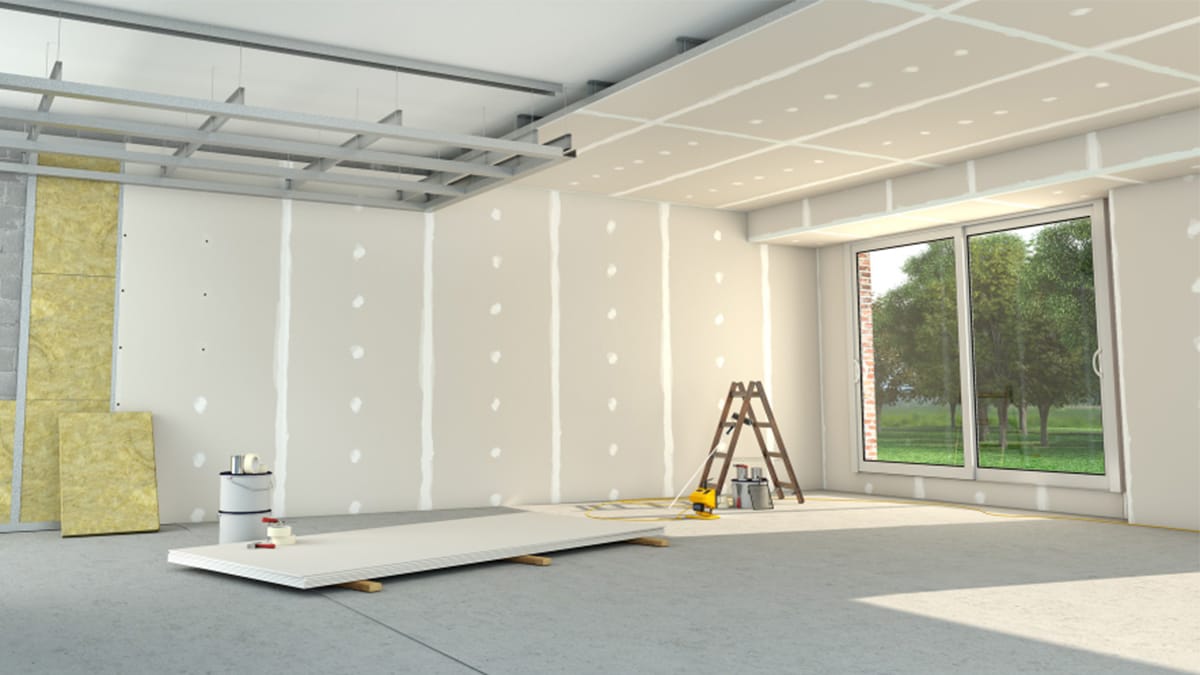
Install MGO Board: Preparation Steps
 Site and Surface Cleaning
 Site and Surface Cleaning
You need to start every magnesium oxide sheathing installation with a clean work area. Dust, dirt, and loose pieces can stop the boards from sticking well. Use a broom or a vacuum to remove all dust and debris. Wipe away any grease or oil with a damp cloth. If you see cracks or holes, fill them with a leveling compound. This step gives you a smooth and flat surface. A level base helps prevent the boards from cracking later.
Tip: Always check that the subfloor or wall is dry and strong before you install mgo board. Wood should have a moisture level between 2-4%. Concrete should be under 75%. This helps stop future moisture and mold problems.
Substrate Inspection and Keel Setup
Before you install mgo board, you must inspect all materials and the frame. Make sure you have the right type and amount of magnesium oxide boards. Check that each board is dry, flat, and has no damage. Look at the lightweight steel keels. They should be smooth, rust-free, and straight. The joint compound must be dry and not clumpy.
Here is a step-by-step guide for setting up the substrate and keels for interior partition walls:
Step | Description |
|---|---|
1 | Verify Material Type and Quantity: Check the type, specifications, and quantity of all materials before installation. |
2 | Inspect MGO Boards: Ensure that all MGO boards are dry, flat, and free from damage or surface bulges. |
3 | Check Lightweight Steel Keels: Ensure keels are smooth, rust-free, and free from distortion. |
4 | Inspect Joint Compound: Ensure the compound is dry, clump-free, and not damp. |
5 | Secure Horizontal Keels: Fix top and bottom horizontal keels to the structure and floor using suitable fasteners. |
6 | Cut and Insert Vertical Keels: Measure and cut vertical keels, leaving a 5mm margin for fitting. |
7 | Check Verticality: Use a plumb line to confirm vertical keels are perpendicular. |
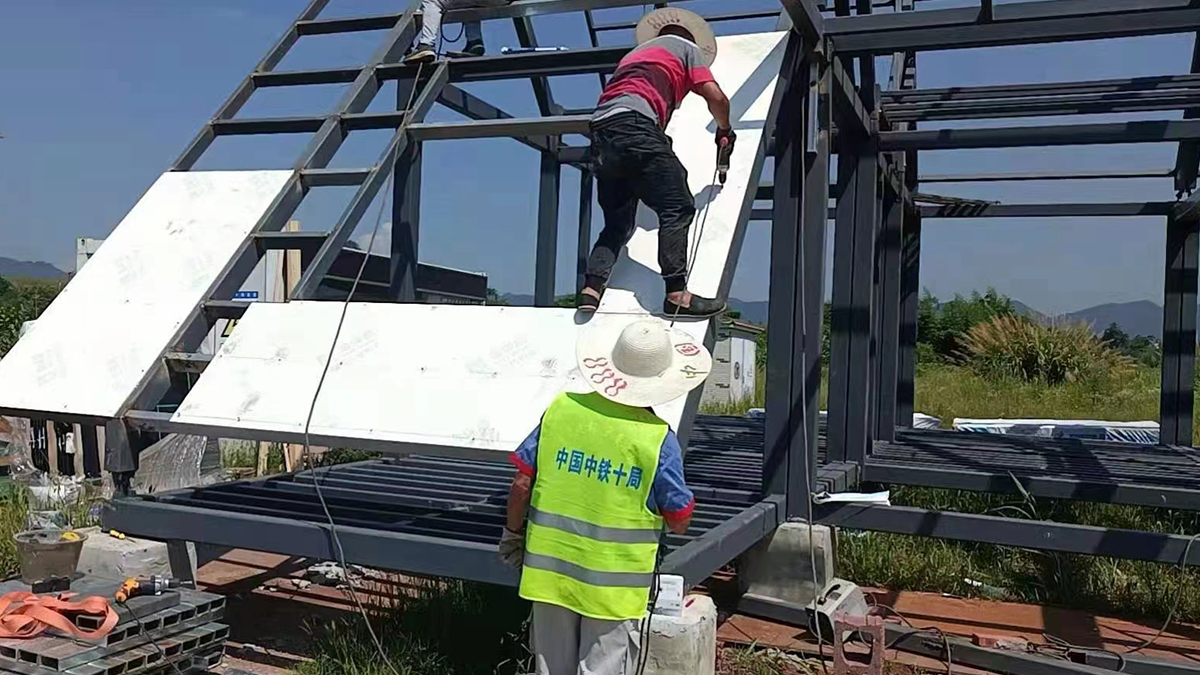
8 | Install First Layer of MGO Boards: Install one layer of MGO boards on one side of the keel frame. |
You should always use a plumb line to check that the vertical keels are straight. Secure the horizontal keels with the right fasteners. When you install mgo board, start with one side of the frame. This makes the wall strong and ready for insulation.
Moisture Management
Moisture control is a key part of every magnesium oxide sheathing installation. Magnesium oxide panels resist water, so they help stop moisture from getting inside your walls. This keeps mold and mildew from growing, which protects your indoor air quality. When you install mgo board, you lower the risk of moisture damage and cut down on future repair costs.
Magnesium oxide boards block water from entering the wall.
They help keep the air inside your building clean and healthy.
Their strength means you will spend less on repairs over time.
Note: Always check the moisture level of the surface before you install mgo board. This step helps you avoid problems with mold and keeps your installation strong for years.
By following these preparation steps, you set the stage for a successful magnesium oxide sheathing installation. Clean surfaces, careful inspection, and good moisture control help you install mgo board with confidence and get the best results.
Magnesium Wall Board: Measuring and Cutting
Accurate Measurement Methods
 Accurate Measurement Methods
You need to measure carefully before you start cutting magnesium oxide boards. Accurate measurements help you avoid mistakes and save materials. Always use a tape measure and a square to check your lines. Make sure the surface is clean and dry before you measure. This step helps the magnesium wall board stick well and last longer.
Here is a table with tips for accurate measurement and preparation:
Tip | Description |
|---|---|
Surface Preparation | Clean and dry the surface to help the magnesium wall board bond well. |
Adhesive Selection | Use a high-quality adhesive that works with magnesium wall board. |
Even Application | Spread adhesive evenly to avoid bumps or gaps. |
Pressing and Securing | Press the magnesium wall board firmly and use a roller to remove air pockets. |
Allow Sufficient Drying Time | Follow drying times from the manufacturer for a strong hold. |
Marking, Scoring, and Cutting Boards
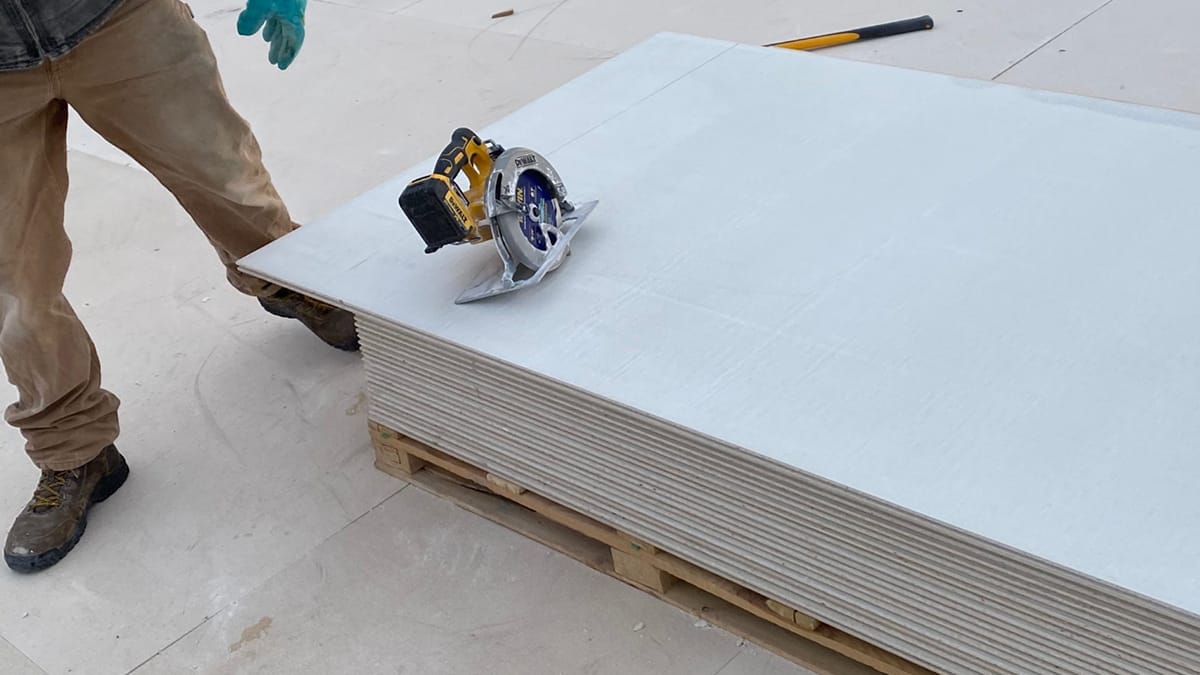
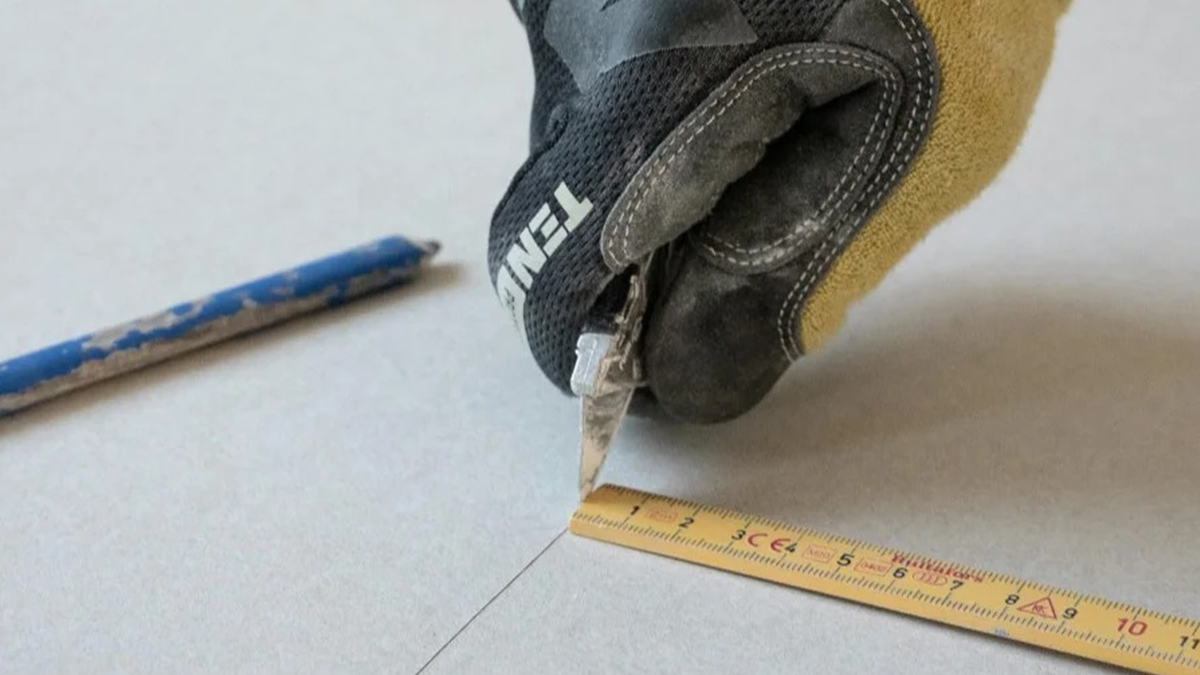
You must mark each magnesium wall board before you cut. Use a pencil and a straight edge to draw your lines. Cutting magnesium oxide boards works best with carbide-tipped tools. These tools make clean edges and keep dust low. You can use a scoring knife for straight cuts or fiber cement shears for small cuts.
Use carbide-tipped tools for cutting magnesium oxide boards.
Mark your lines with a pencil and a square.
Score the board along the line, then snap it for a clean break.
Seal all joints and edges with silicone caulk to stop moisture.
Cutting and fitting each magnesium wall board helps you get a tight fit and a smooth finish. Always check your cuts before you install the boards.
Staggering Panels and Gap Sizing
When you install magnesium wall board, you need to stagger the panels. Staggering makes the wall stronger and helps stop cracks. Lay out the panels on the floor first to see the pattern and reduce waste. Keep a minimum overlap of 8-12 inches between panels. For high-wind areas, use a greater overlap.
Stagger panels for a strong wall.
Lay out panels before nailing to plan your pattern.
Keep a consistent staggering pattern across the wall.
Start with a panel that reduces cuts and waste.
You must leave the right gap between panels. For steel frames, keep a gap of 1/16 inch. For wood frames, use a gap of 1/8 inch. These gaps let the magnesium wall board expand and contract without damage.
Tip: Always check your gaps before fastening. Proper gap sizing helps prevent buckling and keeps your wall looking good.
Installation Instructions: Fastening and Fixing
Fastener Selection and Spacing
You need to choose the right fasteners and follow the correct spacing for a strong wall. The type of fastener depends on the frame material. You must always follow the latest installation instructions from the manufacturer. Using the right fasteners helps your magnesium wall board stay secure and last longer.
Here is a table to help you pick the correct fasteners and spacing:
Fastener Type | Material/Specification | Spacing Requirements |
|---|---|---|
Fastening to wood studs | #8 flat head fasteners with high/low threads | No closer than 4” from corners, 6” apart perimeter, 12” apart center |
Fastening to metal | 18 gauge or heavier, #8 flat head screw with nibs | Same as above, with pneumatic fastening for lighter gauge materials |
Fastener Installation | 316-stainless steel or ceramic coated fasteners | 9/16” from board edge, no 45º angles |
You should never place fasteners too close to the edge of the magnesium wall board. Keep each fastener at least 9/16 inch from the edge. This prevents cracks and keeps the board strong. For best results, space fasteners 6 inches apart around the edges and 12 inches apart in the center. Do not install fasteners at a 45-degree angle.
Tip: Always check your fastener spacing before moving to the next board. Good fastening and spacing will help your wall resist movement and damage.
Secure Attachment Techniques
You must use the right fastening techniques to attach magnesium oxide boards. Start by holding the board tight against the frame. Drive each fastener straight in, so the head sits flush with the surface. Do not overdrive the fastener, or you may weaken the board. Use a screw gun with a clutch to control the depth.
Work from the center of the board out to the edges. This method helps remove air pockets and keeps the board flat. If you use a pneumatic tool, set the pressure low to avoid damaging the magnesium wall board. Always check that each fastener is secure before you move on.
Note: Follow the installation instructions from the board manufacturer. Each brand may have special rules for fastening techniques.
Handling Corners and Openings
Corners and openings need extra care during installation. You want these areas to stay strong and look neat. Follow these steps for the best results:
Read the manufacturer’s instructions for corners. Some brands have special rules.
Use special tape or compound at the corner seams if the manufacturer suggests it.
After fastening the boards, check the corner seams for gaps.
Fill small gaps with non-shrinking caulk. This stops water and air from getting in.
Make sure the finished seams at the corners are smooth and even. This gives your wall strong support and a clean look.
When you work around windows, doors, or other openings, cut the magnesium wall board to fit snugly. Leave a small gap for movement, then seal it with caulk or tape. This step keeps your wall safe from moisture and air leaks.
Callout: Take your time with corners and openings. Careful work here will make your whole wall last longer.
By following these fastening and spacing rules, you will build a wall that is strong and ready for finishing. Good fastening techniques and careful work at corners and openings help your magnesium oxide boards perform their best.
Magnesium Oxide Boards: Sealing and Joint Treatment
Sealing Edges and Joints
 Sealing Edges and Joints
You keep water out by sealing every edge and joint. Magnesium oxide boards need good sealing to stop leaks. Always check that the panels fit close together. Gaps let water in and make the wall weak. Here are some best ways to seal:
Put waterproof sealant on all the edges.
Use joint tape before you cover seams to stop leaks.
Make sure the panels fit close so there are no gaps.
Tip: Sealing each joint and edge helps your magnesium oxide boards last longer. This keeps your building safe from water damage.
Moisture Barrier Application
A strong moisture barrier keeps water out of your walls. Magnesium oxide boards work well with special coatings and insulation. These layers block air and water but let the wall dry. The table below shows the best moisture barrier parts for magnesium oxide boards:
Component | Description |
|---|---|
Structural Sheathing | Magnesium oxide (MgO) |
Exterior Coating | Air and water barrier, chemically bonded to MgO board, designed for magnesium oxide boards. |
Interior Insulation | Poured polyurethane insulation, strong adhesion and moisture control. |
Vapor Permeability | Magnesium oxide boards allow drying, while the coating has variable vapor permeance. |
Note: Always pick a moisture barrier that works with magnesium oxide boards. This step keeps your walls dry and strong.
Joint Tape and Sealant Options
Pick the right tape and sealant to finish your wall. The best ones help you get a smooth, fire-safe surface. Look for tapes and compounds with strong safety marks. The table below lists the top choices for 2025:
Product Type | Description |
|---|---|
Fiberglass Mesh Tape | At least 6 inches wide, strong, fire-resistant, ideal for taping joints in magnesium oxide boards. |
Fire-Rated Joint Compound | Sandable elastomeric or lightweight concrete patching compounds recommended for magnesium oxide boards. |
Certifications | ASTM E136 for noncombustibility, EN 13501-1 for fire classification. |
Callout: Using certified joint tape and sealant gives your magnesium oxide boards more protection and a neat finish.
Your installation lasts longer when you seal every edge, use the right moisture barrier, and pick certified joint tape and sealant. Magnesium oxide boards stay strong and keep out water if you follow these steps.
Finishing Magnesium Oxide Sheathing
Surface Finishing Choices
 Surface Finishing Choices
You have several options when you finish a magnesium wall board. Each choice gives your wall a different look and level of protection. The table below shows common surface finishing options and their advantages:
Surface Finishing | Advantages |
|---|---|
Painting | Saves time, provides a smooth finish, enhances moisture resistance |
Tiling | Compatible with thin-set mortar, suitable for wet areas |
Plastering | Allows for a durable finish, enhances aesthetics |
Painting works well if you want a fast and clean look. Tiling fits best in bathrooms or kitchens where water is common. Plastering gives your wall a strong and stylish surface. You can pick the finish that matches your needs and style.
Painting and Coating
You can paint magnesium wall board with most water-based paints. Always use a primer before you apply the topcoat. This step helps the paint stick better and last longer. For extra protection, you can use a moisture-resistant coating. This coating keeps water out and helps your wall stay strong. If you want a bright color or a smooth surface, painting is a good choice. You should wait until the wall is dry before you start painting or coating. This step is important for a good result in finishing magnesium wall board installation.
Tip: Use a roller for large areas and a brush for corners. This method gives you an even finish.
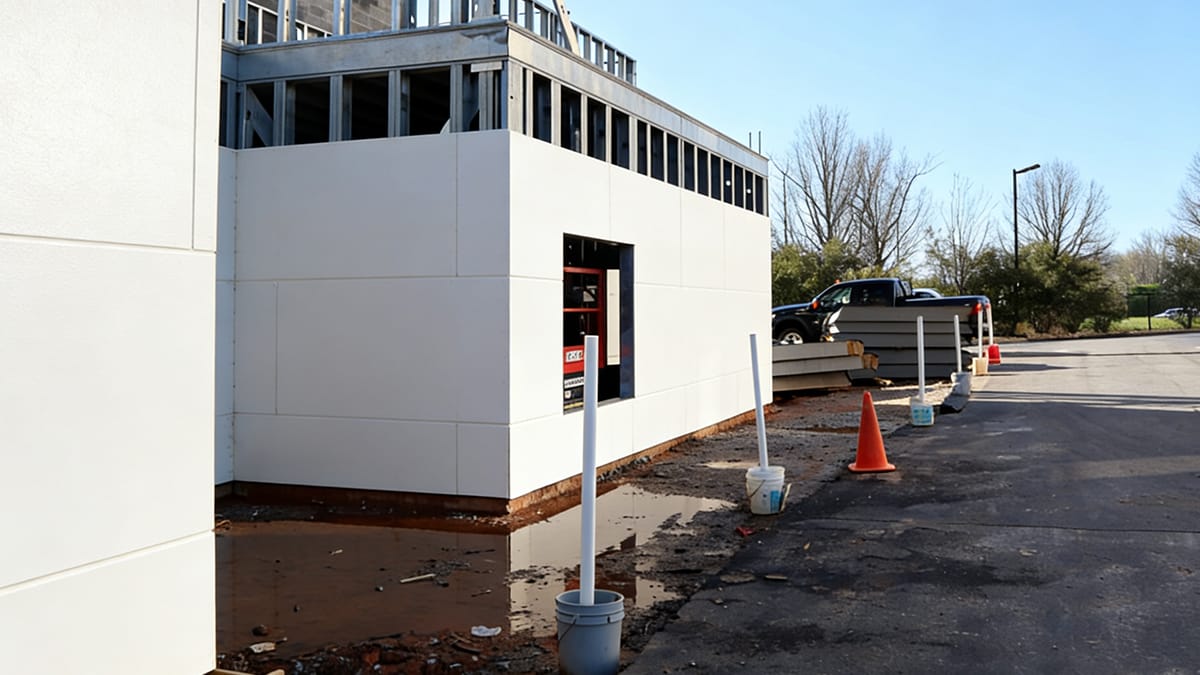
Cladding Compatibility
You can use many types of cladding with magnesium wall board. These boards work well because they are strong and do not burn. Builders use them for siding and cladding on the outside of buildings. Magnesium wall board stands up to rain, sun, and frost. This feature makes it a safe and long-lasting choice for outside walls.
Magnesium wall board fits with many cladding types because it is durable and noncombustible.
You can use it for siding and cladding in outdoor spaces.
It resists rain, UV rays, and frost, so it works well in many climates.
When you finish magnesium wall board installation, you can trust that your wall will stay safe and look good for years. You have many options for finishing and cladding, so you can create the look and protection you want.
Troubleshooting Magnesium Oxide Sheathing Installation
Common Installation Mistakes
You might have problems when you put in magnesium oxide sheathing. Many people make the same mistakes. If you know what to watch for, you can stop problems before they start. The table below lists the most common mistakes and why they happen:
Common Mistakes | Causes |
|---|---|
Moisture absorption | Poor ventilation, high-moisture environments, improper sealing, exposure to rain |
Cracking and warping | Uneven drying, improper storage, temperature changes, over-tightening screws |
Moisture absorption happens if you do not seal the boards or leave them in wet places. Cracking and warping can happen if you store boards wrong or use too much force with screws.
Tip: Always keep boards dry and seal every edge before you start.
Solutions and Fixes
You can fix most mistakes if you follow the right steps. The table below gives you quick tips for common problems:
Installation Aspect | Best Practice / Quantitative Tip |
|---|---|
Acclimation Time | Keep boards in the installation area for 48 hours |
Screw Spacing | Place screws at 16″ centers |
Edge Gap (Expansion) | Leave 1/8 inch around perimeter walls |
Board Placement Gap | Keep 1/16 inch between boards on steel framing |
Fastener Material | Use 316 stainless steel or ceramic coated fasteners |
Let the boards sit in the room for two days before you put them up. Use the right screw spacing and leave small gaps so the boards can move. Pick strong fasteners that do not rust.
Note: Small changes in how you work can stop big problems later.
Ensuring a Professional Finish
You want your wall to look nice and last a long time. Follow these steps for a good finish:
Get the surface ready. Make sure it is flat and dry. Clean off dust and check for water damage.
Measure and plan where each panel goes. Stagger the joints and leave space for the boards to move.
Seal all the joints and seams with a flexible sealant or joint compound.
Fill screw holes with joint compound to make the wall smooth.
Put on primer before you paint or coat the wall. This helps the paint stick and keeps out water.
If you do these steps, your wall will be strong and look good. Your magnesium oxide sheathing will stay safe for many years.
Callout: Careful work at every step gives you the best results and saves you time on repairs.
You can install magnesium oxide sheathing well if you follow these steps. First, measure the space and cut the boards to fit. Next, clean the area so it is ready for the boards. Put the boards in place and use the right fasteners. Make sure you leave enough space between each board. Seal every seam and edge to keep water out. Check your work and finish the wall so it stays strong.
Many people say magnesium oxide sheathing helps keep rooms dry and safe. If you have questions or want to tell your story, write a comment below.
FAQ
How do you store magnesium oxide boards before installation?
You should keep boards flat and dry. Store them indoors on a raised surface. Cover the boards with a tarp if you work outside. Avoid stacking heavy items on top. This helps prevent warping and moisture damage.
Can you cut magnesium oxide boards with regular tools?
You can use a carbide-tipped scoring knife or fiber cement shears. These tools make clean cuts. Avoid using regular wood saws. They create too much dust and may damage the board.
What is the best way to seal joints between boards?
Use fiberglass mesh tape and a fire-rated joint compound. Apply the tape over the joint, then cover it with compound. This method keeps water out and gives you a smooth finish.
Are magnesium oxide boards safe for wet areas like bathrooms?
Yes, you can use magnesium oxide boards in wet areas. They resist water and mold. Always seal all edges and joints. Add a moisture barrier for extra protection.
Do you need to prime magnesium oxide boards before painting?
Step | Action |
|---|---|
1 | Clean the board surface |
2 | Apply a primer |
3 | Paint with water-based paint |
You should always use a primer. This helps the paint stick and last longer.