07 May Step-by-Step Guide to Installing MgO Building Panels for 2026
You put in MgO building panels by getting surfaces ready. You measure and cut each panel to fit right. Fasten every panel so it stays in place. Finish every joint with care and attention. Many builders pick MgO because it is good for the earth. It also does not burn easily. You can trust this material to make your project safer. It also makes it last longer. Homeowners and workers both do well with easy steps. These panels help make homes safer and quieter. They also help make spaces healthier for all people.
Key Takeaways
MgO building panels are strong and light. They do not burn easily. This makes them safe for many building jobs.
Getting the site ready is very important. Clean the space well. Look for any problems. Let the panels get used to the area. This helps the installation go well.
Measure the panels carefully. Cut the MgO boards with care. This stops waste and helps the panels fit right.
Attach the panels tightly with screws that do not rust. Always leave small gaps for the panels to move. This is because of changes in temperature.
Seal the joints well. Use the correct primer and paint. This makes the walls last longer and look better.
MgO Building Panels Overview
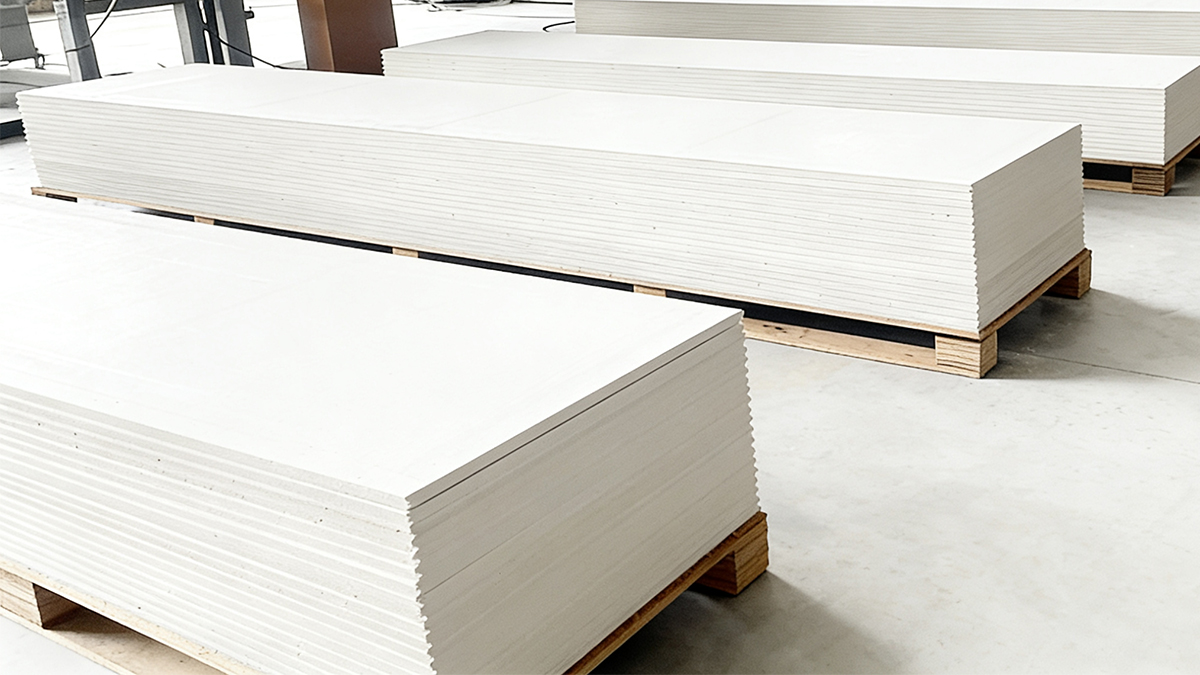
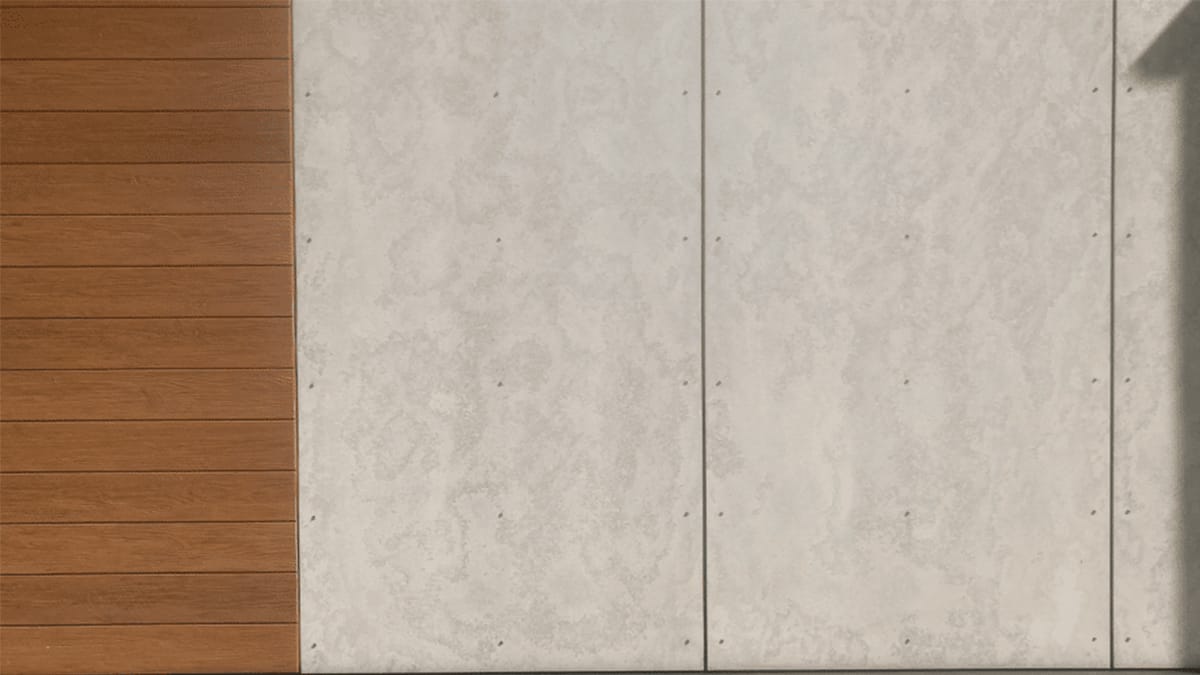
What Are MgO Building Panels
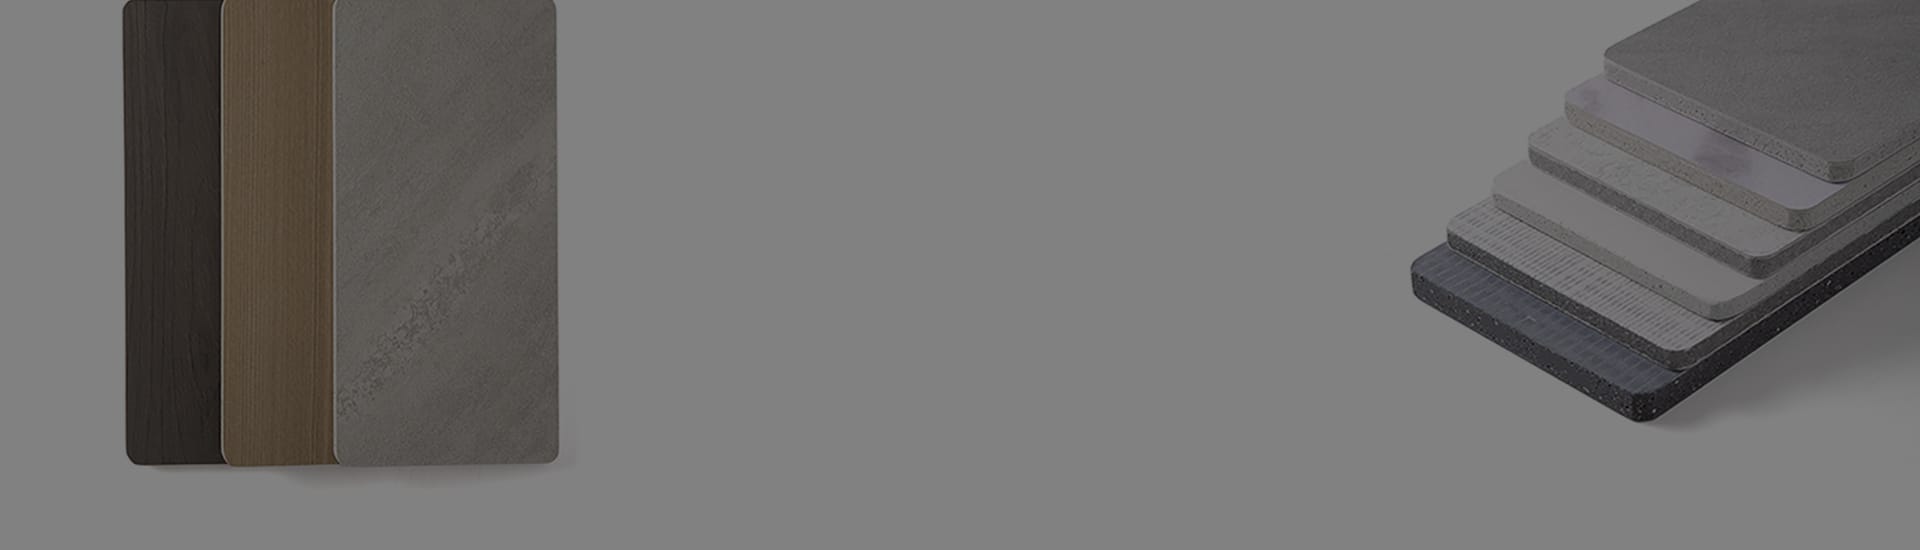
You might ask why MgO building panels are special. These panels are made with magnesium oxide board. This makes them strong and light. You can use them in many different places. MgO building panels are good because they do not burn easily. They also do not get damaged by water or bugs. Look at the table below to see how they compare to other materials:
Property | Description |
|---|---|
Fire Resistance | Withstands temperatures over 750°C (1,382°F) without discoloration, ideal for fire-rated walls. |
Mold and Mildew Resistance | Naturally resists moisture, preventing mold and mildew growth for healthier indoor environments. |
Pest Resistance | Impervious to pests like termites, reducing the need for harmful chemicals. |
Dimensional Stability | Maintains shape without warping or swelling, ensuring stability in various conditions. |
Environmental Sustainability | Made from low energy and natural materials, supporting sustainable construction practices. |
MgO building panels keep their shape and strength even when things get tough. They help you make your space safer and healthier.
Benefits and Uses
MgO building panels have lots of good things for your project. They keep heat in during winter and out during summer. This means your home feels better all year. These panels also block noise, so your space is quieter. You do not need to worry about mold or mildew. The panels do not let water or moisture in.
Tip: MgO building panels can help you get green building awards like LEED and BREEAM. They use natural stuff and make less pollution.
You can use MgO building panels in many ways. Here are some examples:
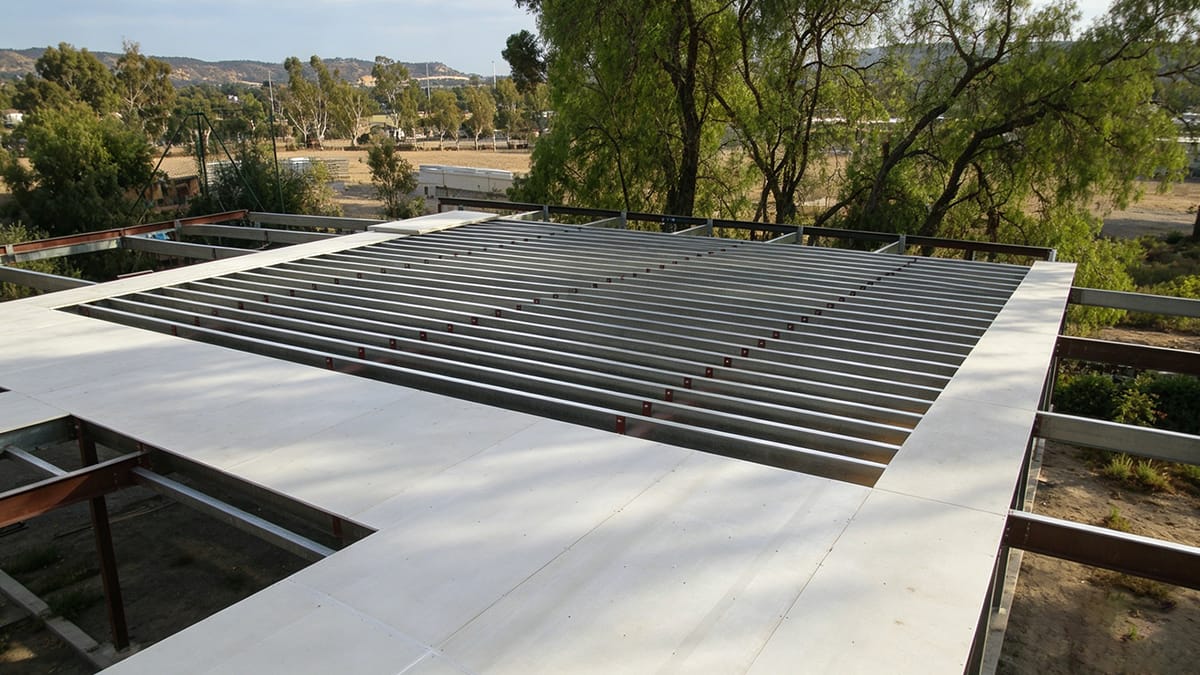
Under floors where people walk a lot
On roofs for more insulation and weather safety
Outside walls to stop bugs and for a cool look
Decoration for a smooth and modern style
MgO building panels make building faster and easier. You can use them in homes, schools, offices, and hospitals. MgO panels give you a strong, safe, and earth-friendly choice for almost any building job.
Tools and Materials for Installation
 You need to get all your tools and materials before you start. This helps you work safely and finish the job well. The right tools help you cut panels straight and attach them tight. You also stay safe from dust and sharp edges.
Essential Tools List
You need different tools for this project. Each tool has a special job and helps you work better.
Dust mask
Gloves
Putty knife
Saw horses
Square
Carbide-tipped scoring knife or utility knife
Fiber cement shears
Dust-reducing circular saw
You use a scoring knife or saw to cut panels. A square helps you draw straight lines. Saw horses hold the panels steady. These tools make cutting and moving MgO panels safer and easier.
Materials Checklist
You need the right materials to put up and finish the panels. Each one helps you do a good job.
Material | Role in Installation |
|---|---|
Secure the MgO boards to the framing or substrate. | |
Adhesives | Bond the boards together and to other surfaces. |
Finishing techniques | Enhance durability and aesthetics of the installation. |
Fasteners keep the panels in place. Adhesives stick the panels to walls or floors. Finishing techniques make the surface smooth and strong. These materials help you get a solid and nice-looking finish.
Safety Gear
You must protect yourself when you work. Cutting or sanding MgO panels makes dust. You need safety gear to stay safe.
Dust mask: Stops dust from getting in your lungs.
Safety glasses: Keep your eyes safe from small pieces.
Gloves: Protect your hands from sharp edges.
Always be careful when you move the panels. Keep the boards dry so they stay fire-resistant. Using the right tools and materials makes your work safer and better.
Tip: Always follow the maker’s instructions and use the right materials. This keeps your project safe and strong.
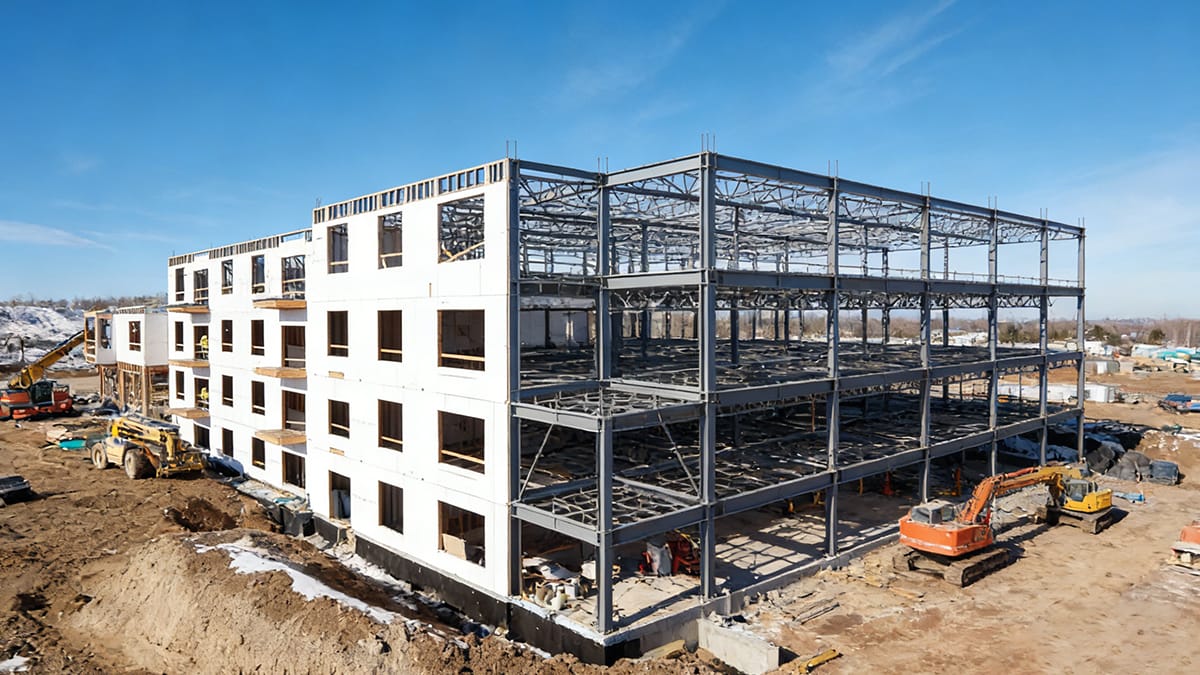
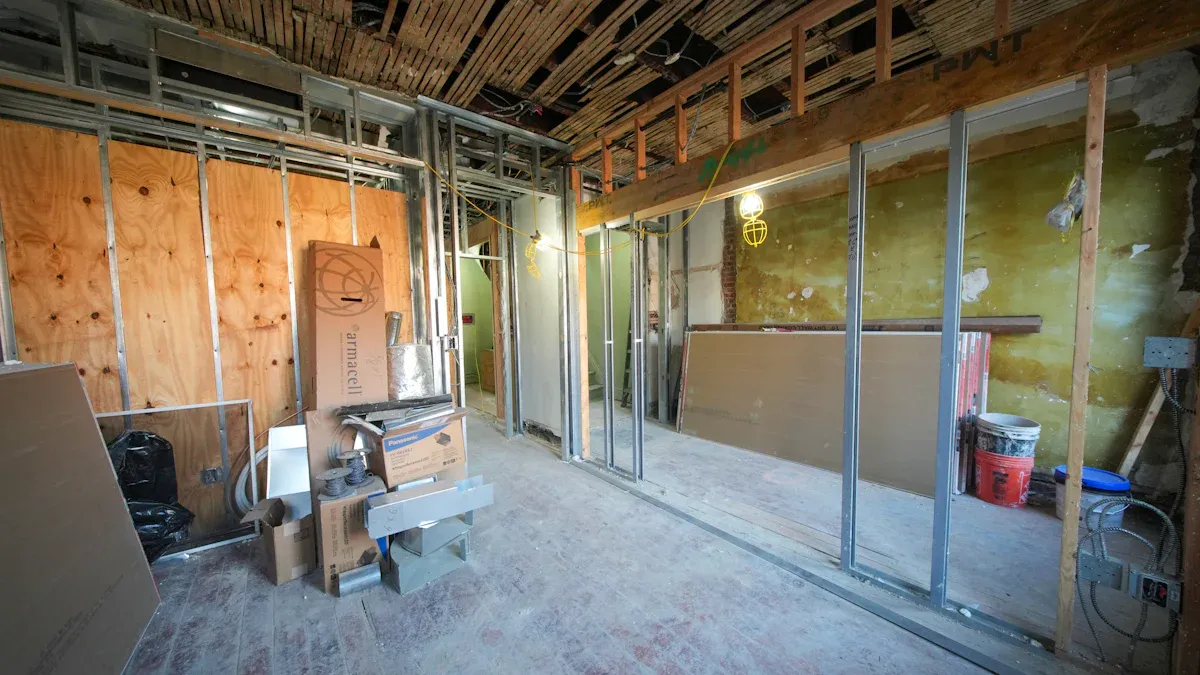
Surface Preparation for Magnesium Oxide Board
 Cleaning and Drying the Surface
 Cleaning and Drying the Surface
You need to start with good site preparation before you install magnesium oxide boards. Clean the area where you will work. Remove all dirt, dust, and debris. A clean surface helps the boards stick well and last longer. Make sure the site stays dry. Moisture can damage the panels and weaken the installation. You should also check that the temperature in the room stays between 5°C and 35°C. This range helps the panels perform their best.
Tip: Good site preparation means you will have fewer problems later. You will get a smoother finish and stronger walls.
Checking for Imperfections
Look closely at the surface before you begin. Check for bumps, cracks, or holes. Fix any problems you find. A flat and stable surface is important for proper adhesion. If you see any loose parts, remove them. Complete all major work, like plumbing or wiring, before you start. This step prevents you from having to redo your work. Site preparation also means waiting until the main structure is finished. This keeps the panels safe and secure.
Acclimating MgO Panels
You must let the panels adjust to the room before you install them. This process is called acclimation. It helps the boards match the temperature and humidity of the space. Place the panels in the room for at least 3 to 5 days. Make sure the heating or cooling system runs for at least 72 hours before you bring in the panels. This step keeps the panels from warping or cracking after installation.
Procedure | Details |
|---|---|
Acclimatization Duration | Allow the boards to acclimatize for at least 3-5 days. |
HVAC Operation | Ensure the HVAC system is operational at least 72 hours prior to acclimation. |
Good site preparation and careful acclimation help you get the best results. You protect your investment and improve safety for everyone on the job.
Measuring and Cutting MgO Boards
Accurate Measurement
You need to measure each panel before cutting mgo boards. Start with a measuring tape. Check the length and width of the space where you will install the panels. Place the mgo board on a stable surface. Use a T-square to draw straight lines. Mark your lines with a pencil so you can see them clearly. Double-check your measurements. If you plan for proper placement, you avoid misalignment. Leave expansion gaps, about 1/8-inch, between panels. This step helps the panels move when the temperature or humidity changes. Make sure the surface stays flat and dry. You get a smooth finish when you follow these steps.
Tip: Careful measurement prevents waste and saves time during cutting mgo boards.
Marking and Cutting Techniques
You must use the right tools and methods for cutting mgo boards. Begin by marking the cut line with a pencil. Place the board on a stable surface. This step keeps the board from sagging and helps you reach the marked line easily. Choose your cutting method based on the thickness of the board. Use a utility knife for thin boards. For thicker boards, use a circular saw. Cut slowly to avoid chipping. Keep your hand steady and apply consistent pressure. You get clean edges when you follow these steps.
Here is a simple table to help you choose the right tool for cutting mgo boards:
Board Thickness | Recommended Tool |
|---|---|
Thin | Utility knife |
Thick | Circular saw |
After cutting mgo boards, sand or file the edges. This step ensures a smooth fit between panels. Clean up dust and debris. Wear a dust mask to protect yourself. Cutting mgo boards with care gives you strong and neat results.
Note: Always check your tools before cutting mgo boards. Sharp blades make cutting easier and safer.
You improve your project when you use accurate measurement and proper cutting mgo boards techniques. You get panels that fit well and look professional.
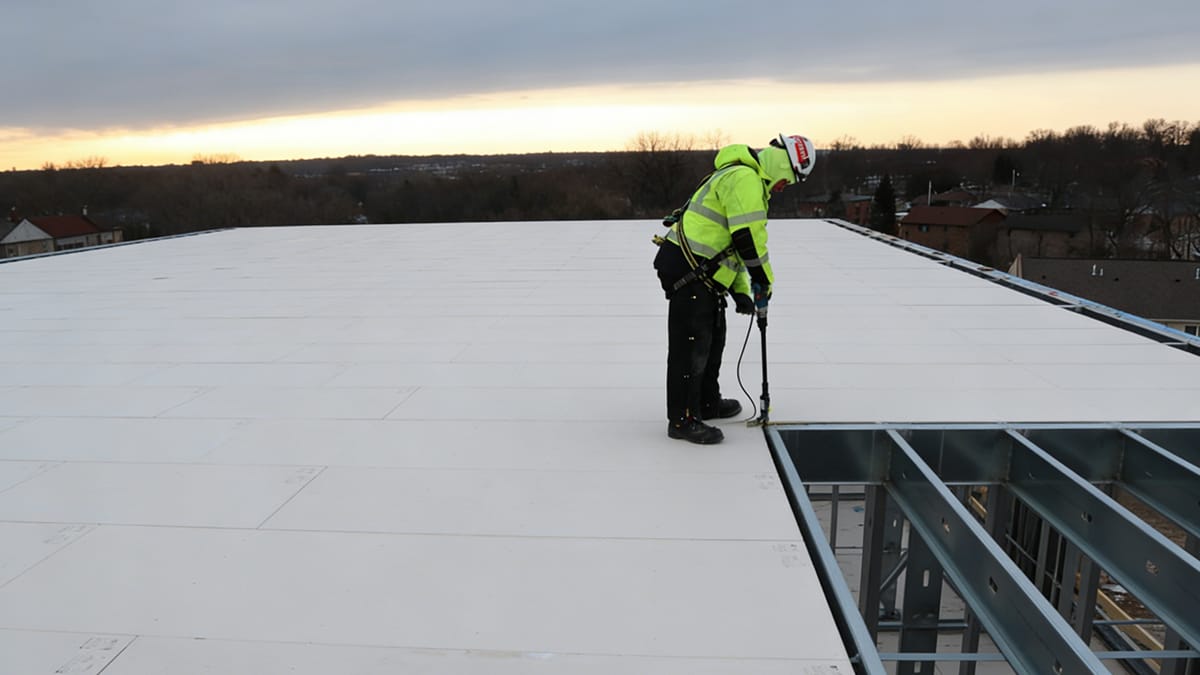
MgO Board Installation Steps
Positioning Panels
You start mgo board installation by preparing the wall frame. Fix the top and bottom horizontal keels to the building structure and floor. Use expansion screws, shot nails, or other strong fasteners. Make sure adjacent fasteners are no more than 600mm apart. This keeps the wall stable and ready for laying the boards.
Next, measure the distance between the top and bottom horizontal keels. Cut the vertical keels to fit, leaving a 5mm margin. This small gap helps you fit the keels easily. Insert the vertical keels into the horizontal keels. Keep the orientation the same for each keel. Do not place any keel upside down. If you need to cut a vertical keel, put the cut end facing up when you insert it.
Check the spacing for the vertical keels. The standard is 600mm, but you can use 400mm or 300mm if your wall needs more support. Never go over 600mm. Use a plumb line to make sure the vertical keels stand straight. Do not fix the horizontal and vertical keels permanently yet. You will adjust them during mgo board installation to match the boards.
Now, you can start laying the mgo boards on one side of the wall frame. Adjust the keels as you go. This step helps you get perfect wall positioning and alignment. When you finish laying the boards, you can fix the keels in place. This method gives you a strong, straight wall.
Tip: Always check the wall positioning with a level or plumb line before fastening the boards. This step keeps your wall flat and smooth.
Fastening Panels Securely
After positioning the boards, you need to fasten them to the wall frame. Use corrosion-resistant screws, such as stainless steel or phosphoric coated drywall screws. These screws last longer and keep your wall safe. Start fastening at the center of each board and work outward. This method keeps the board flat and prevents bulges.
Here is a table to help you choose the right screw spacing for different wall applications:
Board Thickness | Application | Screw Spacing |
|---|---|---|
8 mm | Ceilings | 8-12 inches |
10-12 mm | Standard walls | 8-12 inches |
15 mm | High-impact/fire use | 8-12 inches |
When fastening to wood studs, use #8 flat head fasteners with high/low threads. For metal, use #8 flat head screws with nibs for countersinking. Place fasteners no closer than 4 inches from the corners of the boards. Put perimeter fasteners 6 inches apart and center fasteners 12 inches apart. Use self-counterboring screws to make the surface smooth.
You should always use the right tools for fastening. A power drill with a screw bit works best. Check that each screw sits just below the surface of the board. Do not over-tighten, or you may crack the board. Fastening the boards with the correct spacing gives your wall strength and durability.
Note: Follow the installation instructions for your specific mgo boards. Using the right tools and materials helps you avoid mistakes.
Expansion Gaps and Alignment
You must leave expansion gaps between the boards during mgo board installation. These gaps let the boards move when the temperature or humidity changes. If you skip this step, the boards may crack or warp. Leave about 1/8-inch (3mm) gap between each board. Use a spacer or a piece of cardboard to keep the gaps even as you lay the boards.
Check the alignment of each board as you go. Use a level to make sure the boards line up with the wall frame. Good wall positioning and alignment make your wall look professional. Adjust the boards before fastening if you see any gaps or uneven edges.
Here is a simple step-by-step guide for laying the mgo boards with proper expansion gaps:
Place the first board at the bottom of the wall frame.
Use a spacer to set the expansion gap between the board and the floor.
Position the next board beside the first, keeping a 1/8-inch gap.
Check the alignment with a level.
Continue laying the mgo boards, checking gaps and alignment after each one.
Laying the mgo boards with the right gaps and alignment helps your wall stay strong for years. You also make the finishing steps easier.
Tip: Always follow the installation instructions for laying the mgo boards. Good preparation and careful wall positioning give you the best results.
By following these step-by-step guide instructions, you make mgo board installation safe, strong, and long-lasting. You use the right tools, materials, and methods for every part of the process. You also protect your wall and your investment.
Sealing and Finishing Joints
Sealing Joints and Edges
 Sealing Joints and Edges
You need to seal all joints and edges to keep water out and make your walls last longer. Start by cleaning the seams so nothing gets in the way of a good seal. Place fiberglass mesh tape over each joint. This tape helps stop cracks and gives extra strength. Spread joint compound over the tape and smooth the edges. In wet areas, add a waterproof layer over the seams for more protection. Sand the edges before you add caulk or trim. This step helps the sealant stick better. Always pick a sealant that works well with magnesium oxide panels. These steps help you get a strong and neat finish.
Use fiberglass mesh tape to reinforce joints.
Apply joint compound and smooth the edges.
Add a waterproof layer in wet areas.
Sand edges before caulking or trimming.
Tip: Sealing joints and edges keeps moisture out and helps your project last for years.
Treating Screw Heads
You must treat screw heads to get a smooth and strong surface. Use corrosion-resistant fasteners like stainless steel or phosphoric-coated drywall screws. Cover each screw head with a layer of joint compound. For extra support, you can use a barrier coat of epoxy or ceramic adhesive. Pick screws with self-counter boring heads for easy installation. If you work with wood or light steel, gun nails also work well. Use a top-quality joint compound that matches your panels. For wet spaces, use self-adhesive fiberglass tape and a mud or plaster made for moist areas. These steps help you get a clean look and a tough finish.
Use corrosion-resistant screws.
Cover screw heads with joint compound.
Add a barrier coat for extra support.
Pick the right screws for your frame.
Use the best compound for your panels.
Sanding and Smoothing
You need to sand and smooth the joints after the compound dries. Use 240 grit sandpaper for the best results. This grit makes the surface flat and ready for finishing. Do not use sandpaper that is too rough or too fine. Always wipe away dust after sanding. Run your hand over the area to check for rough spots. If you find any low spots, add more compound and sand again. Smoothing the joints is important for a flawless paint finish. Careful sanding helps your finishing layers stick better and look great.
Wipe away dust after sanding.
Check for rough or low spots.
Add more compound if needed.
Make sure the surface is flat before finishing.
Note: Good sanding and smoothing make your finishing work easier and help your walls look professional.
Priming and Painting MgO Panels
Choosing Primers and Paints
You need to pick the right primer before you paint magnesium oxide panels. The primer helps the paint stick and keeps your walls looking good for a long time. Not all primers work well with these panels. You should use acrylic-based or masonry/concrete primers. These types give a strong bond and help stop cracks. Regular drywall primer does not work well and can make the paint peel.
Here is a table to help you choose the best primer for your project:
Primer Type | Works With MGO Boards? | Benefits |
|---|---|---|
Acrylic-based | Yes | Strong bond, neutralizes surface |
Masonry/Concrete Primer | Yes | UV-resistant, prevents cracking |
Regular Drywall Primer | No | Weak bond, poor durability |
After you pick your primer, you need to choose the right paint. Acrylic or latex paints work best for most projects. If you want a textured look, you can use acrylic stucco topcoats or polymer-modified cement base coats. Always test your primer and paint on a small spot first. This step helps you see if the products stick well and do not peel later.
Tip: Testing your primer and paint saves you time and money. You avoid problems before you paint the whole wall.
Applying Finishes
You can make your panels look professional by following a few easy steps. Start by working in a clean, dry, and well-ventilated area. Use high-quality materials for the best results.
Paint the panels with a brush or roller. Spread the paint evenly. Let each coat dry before adding another.
If you want a smooth wall, use plaster. Spread it with a trowel and let it dry. Sand between coats for a flat finish.
For a special look, add texture compounds with the right tools.
Seal the surface with a clear sealant. This step makes your wall last longer.
Take your time and follow the instructions from the manufacturer.
You get a strong and beautiful finish when you use the right primer, paint, and steps. Your mgo panels will look great and stay protected for years.
Final Inspection and Maintenance
Installation Checklist
 Installation Checklist
You should always check your work before you finish the project. A good checklist helps you make sure you did not miss any steps. Use the table below to guide your final inspection:
Step | Description |
|---|---|
Surface Cleaning and Inspection | Make sure the surface is flat and dry. Remove dust and debris. Check for moisture or damage. |
Planning Layout and Expansion Gaps | Measure and plan for proper placement. Leave expansion gaps to prevent buckling. |
Sealing Joints and Seams | Seal all joints with a high-quality compound. This keeps out moisture and mold. |
Filling Screw Holes | Fill screw holes with joint compound. This gives a smooth finish. |
Priming and Surface Finish | Prime the surface before painting. This helps paint stick and keeps out moisture. |
Safety Gear | Wear safety gear to protect yourself from dust and sharp edges. |
Acclimating MgO Boards | Let the boards adjust to room conditions for a good fit. |
Check off each step as you go. This helps you avoid mistakes and keeps your mgo panel installation strong.
Quality Inspection Tips
You want your walls to look good and last a long time. Walk around the room and look at every panel. Make sure all seams are sealed and smooth. Run your hand over the surface to check for bumps or rough spots. Look for cracks, gaps, or loose screws. Test the paint by pressing gently with your finger. The paint should not peel or flake. Check corners and edges for a tight fit. If you find a problem, fix it right away. Careful inspection helps you catch small issues before they become big problems.
Tip: Use a flashlight to see seams and corners better. Good lighting helps you spot mistakes.
When to Seek Professional Help
Sometimes you may see damage or problems you cannot fix. If you find large cracks, water stains, or panels that move, call a professional. You should also get help if you see mold or if the panels do not stay flat. A trained expert can repair or replace damaged boards. This keeps your building safe and strong. Do not wait if you feel unsure about your work. Getting help early saves time and money.
You make your project better when you follow every step for mgo panel installation. Getting ready and finishing the right way helps you build walls that are strong and safe. Use the checklist to look over your work and remember to stay safe. If you find hard jobs or problems, ask an expert for help with mgo board installation. Check the table below for important tips:
Key Points | Description |
|---|---|
Proper Handling | Put panels close together and seal seams with adhesive. |
Fastening | Pick stainless steel fasteners so they last longer. |
Safety Measures | Wear safety gear and do not sweep dust when dry. |
Compliance | Follow building rules for safety and warranty. |
A good system gives you better energy use, keeps out water, and blocks noise. Getting help from an expert for mgo board installation makes sure your walls last a long time.
FAQ
How do you prepare your site before installing MgO panels?
You clean your site and remove all dust and debris. Make sure the site stays dry. Check for any bumps or cracks. Fix these problems before you start. Good site preparation helps your panels last longer and look better.
Can you install MgO panels on any site?
You can use MgO panels on most sites. The site must be stable and dry. Avoid installing panels on a wet or uneven site. Always check the site for damage before you begin. A strong site gives you the best results.
What safety steps should you follow on the site?
You wear gloves, a dust mask, and safety glasses. Keep your site clean and organized. Do not leave tools or panels on the floor. Good safety habits protect you and others on the site.
How do you store MgO panels at the site?
You keep the panels flat and off the ground. Store them in a dry part of the site. Do not let water touch the panels. Cover them if the site is dusty or damp. This keeps your panels in good shape.
Why does site acclimation matter for MgO panels?
You let the panels sit at the site for 3 to 5 days. This step helps the panels adjust to the site’s temperature and humidity. Proper acclimation at the site stops warping and cracking after installation.